Wallykazam T-Shirts – Nickjr

If you haven’t heard, nickjr has a new show called Wallykazam. It’s a fun show geared toward preschool-aged children that promotes literacy. The show is fun, colorful, and educational. Because it’s only been on tv for a few weeks, nickjr does not have merchandise available. For my children who watch the show everyday, that’s a problem. So, last night I broke down and made Wallykazam t-shirts for them.

Wallykazam Shirt 5

Wallykazam Shirt 3

Nickjr is amazing for multiple reasons, one being that they offer free printables, crafts, etc. The image I used on the girls’ shirts was available online. I simply added a layered border to make the image stand out more on the shirts.

If you’d like to make your own Wallykazam shirt like the ones shown above, you can download my free printable here: Wallykazam T-Shirt Printable. Simply print the image onto Avery transfer paper (I used “Dark Transfers”), trim the excess areas, and iron onto your t-shirt. The shirts are available at Hobby Lobby for $3.99 in an array of colors. Take along your 40% coupon, and the shirt is yours for $2.39. For less than $5.00, you can purchase all the supplies needed to create an adorable shirt for your child.

To learn more about Wallykazam, click here. At the provided link you can download Wallykazam printables, watch episodes, and play online games–all for free.

Disney’s Frozen Party – Snowball Cookies

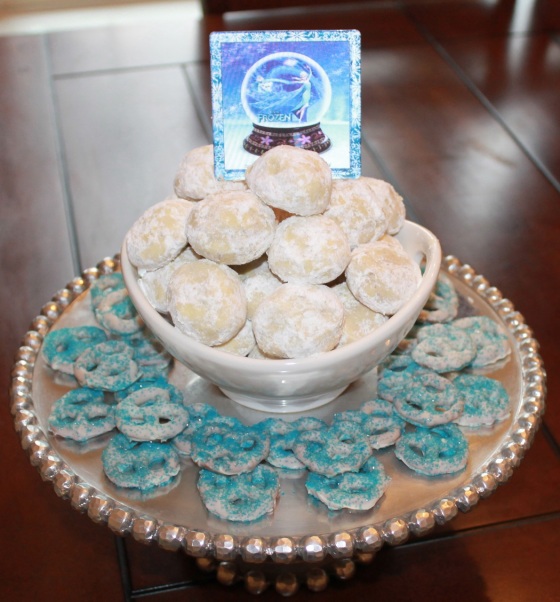
Today I made a family favorite for our Super Bowl party: Mexican Wedding Cookies.  I’ve been making these for years, and have even made nearly 400 of them a couple years ago for my brother’s wedding.  They are small, delectable little treats that leave a trail of powdered sugar on those who partake in the goodness.  Once I stacked them in a bowl for the party, I remembered how much they resemble snowballs.  So, I paired them with the “Frozen Snowflake Snacks” from my last post and created a tower of Frozen-inspired treats.

February 2014 - Snowball Cookies

Mexican Wedding Cookies are simple to make, only require a few ingredients, are ready in about 30 minutes, and can entertain children who like to shake the baggie of sugar to coat them once baked.  Below is my recipe.

INGREDIENTS:

1 cup butter (softened)

1 cup confectioners sugar

2 cups all-purpose flour

2 cups pecans

1 1/2 teaspoons vanilla extract

1/2 teaspoon almond extract

1 teaspoon cinnamon

1 1/2 cups confectioners sugar for coating

DIRECTIONS:

1. Preheat oven to 350 degrees F.

2. Mix all ingredients using an electric mixer until a dough ball forms.

3. Bake 10-12 minutes.

4. Let cool for approximately 15 minutes.

5. Add 1 1/2 cups confectioners to a gallon bag.  Drop the warm cookies into the bag, seal, and shake to coat.

6. Open the bag, shake off the excess sugar, and serve.  Store in an airtight container for up to 7 days.

Disney’s Frozen “Snowflake” Snacks

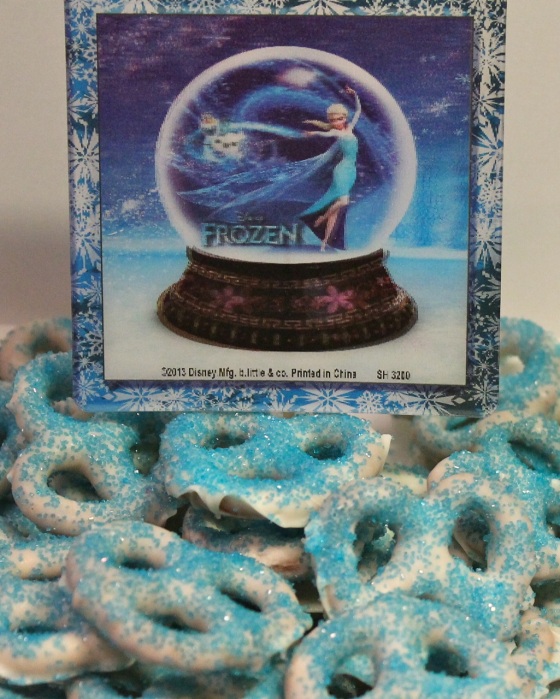
In the midst of snow day #2 in Texas (this never happens!), and considering my 5 year old just built her first snowman, I can’t help but have “Frozen” on my mind–Do you wanna build a snowman?…  So, for our afternoon snack the girls and I put together a quick snowflake treat that we think Elsa would approve of.  This was also a trial run for our upcoming “Frozen” party (this summer!): white chocolate covered pretzels dusted with blue sanding sugar and topped with an Elsa card that we snagged from Subway earlier in the week.

Frozen Snowflakes 2

If you’ve never made chocolate covered pretzels, please try it!  They are fairly quick to make, only require two ingredients (three if you use sugar or sprinkles), and are adored by adults and kids alike.   Using regular pretzels results in a unique shape that resembles snowflake pieces, but dipped pretzel rods would also make a fun icicle-shaped treat for your party.

For a party treat, make them days in advance!

INGREDIENTS:
Almond bark or Wilton melting chips
Pretzels
Sanding sugar or sprinkles (optional)
Parchment Paper
DIRECTIONS:
1.  Place the chocolate in a microwave-safe bowl.  Microwave in 30-second intervals until the chocolate is completely melted, stirring between each interval (you must stir the chocolate each time or the layer against the sides of the bowl will scorch!).
2.  Drop a pretzel into the bowl, cover with chocolate, and then lift out with a fork (I place the pretzel flat on a large dinner fork).  Then, tap the handle of the fork on the side of your bowl a few times to cause the excess chocolate to drop off.
3.  Slide the pretzel onto a piece of parchment paper (aluminum foil will also work).  Top with sanding sugar or sprinkles now, as they will begin to setup after a few minutes.
4.  Allow the pretzels to sit for approximately 20 minutes.  If you’d like to speed up the process, slide the parchment paper onto a plate and slip it in the fridge for about 10 minutes.
5.  You’re pretzels are now ready to eat.  If you’re making them ahead for a party, store them in an airtight container (I use a zip-lock bag) for up to a week.
Enjoy!

Texas Snow Day – Indoor Gardening Activity for Kids

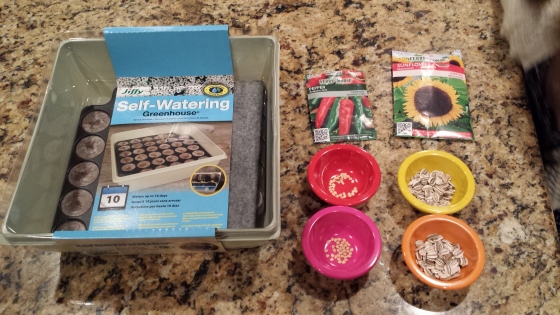
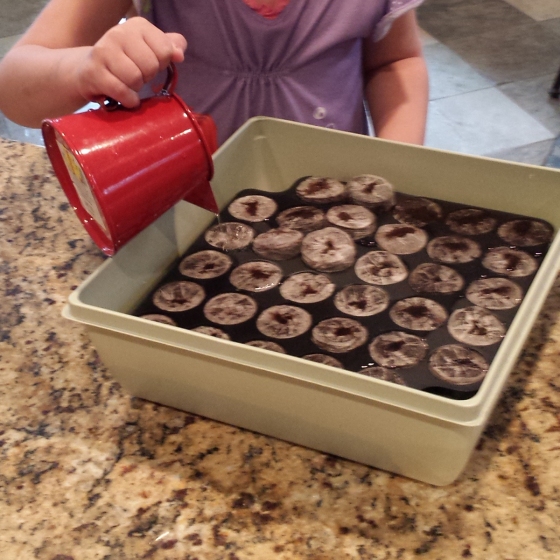
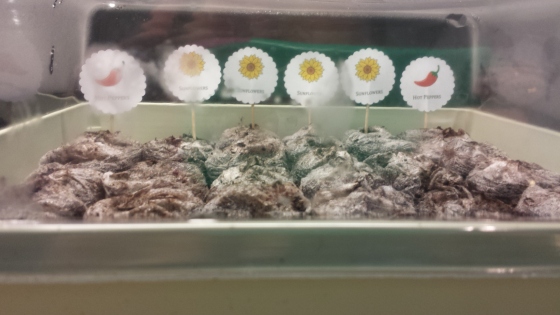
It’s not everyday (or year) that the kids get a “snow day” in Texas.  But today they did.  Yesterday I grabbed a little garden greenhouse set for the girls to plant seeds this winter in preparation for Spring, and I decided that a snow day is a great day to bring that life inside. Although they do love playing with the ice-sickles and frozen items outside, they need to warm up every now and then too.  So, I put them to “work”.  To make your own greenhouse project, grab a small plastic box like the one below (I got one that’s already setup at Lowes with small soil pods) and a few packages of seeds.  20140123_192341

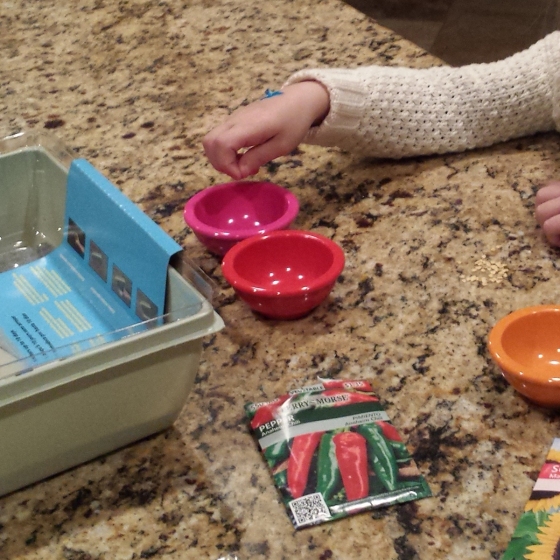
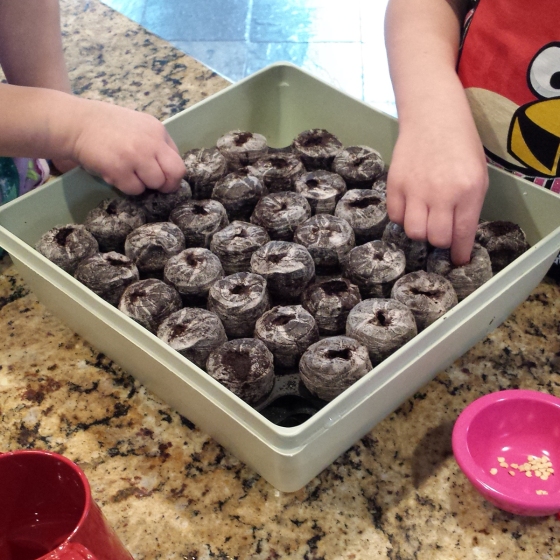
Since I have two children planting, I let them divide each package into two bowl–and then had them count the seeds for good measure 🙂

20140123_191116 copy

Next, fill a watering can with warm water and pour over the soil disks.  The water (if warm enough) will make them expand, and then you can add the seeds. I have used soil disks before that were to be soaked in a bowl of water, which is quite effective too if you aren’t using a self-watering greenhouse like this one.

20140124_110333

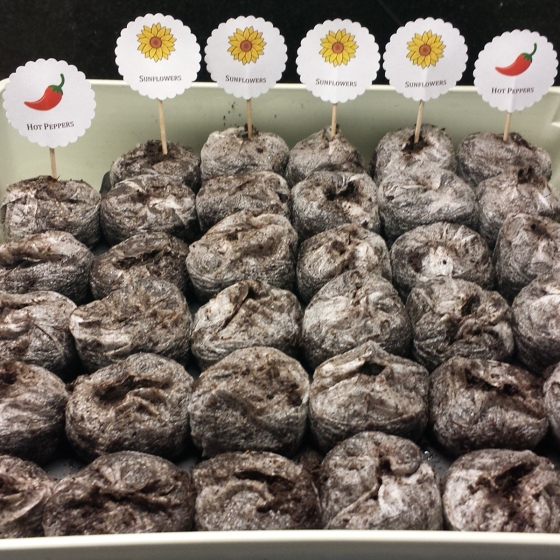
We added about 4 pepper seeds to each pod, and 2 sunflower seeds to each pod (we had some seeds left over).  The container that we used has 32 pods, but they sell larger (and smaller) sets.

20140124_111122

If you’d like, add labels to your rows so that you can tell your plants apart.  You can download the file for the 2″ circle labels that I created for our greenhouse by clicking HERE.  If you’d like to use a 1″ circle, print the file at 75%.  I used a 1″ scalloped circle and taped them to toothpicks.

20140124_121815

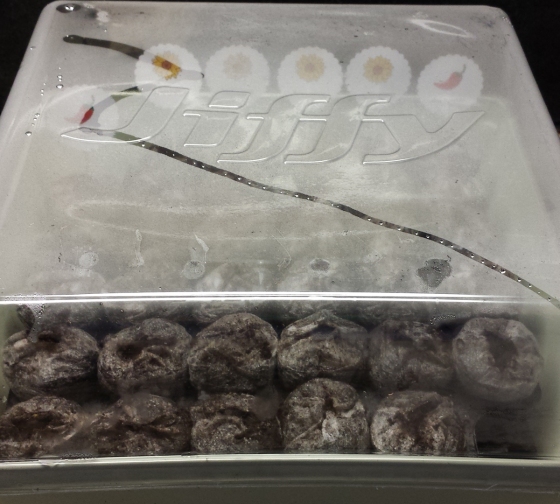
Next, put the lid on top, place near a sunny window, water your seeds every couple of days, and watch them grow!

20140124_121911 copy

Note: As you see here, the plastic lid will become foggy.  This is supposed to happens–it means your plants are warm and hydrated!

20140124_121920

Enjoy growing plants with your little ones and explaining the beauty of life with them!

Disney’s Frozen Birthday Party Idea – Ice in the Summer

At this point my family and I have seen Disney’s Frozen more than once–and both of my girls want a “Frozen party”.  The downside: their birthdays are in the summer.  The upside: I have 6+ months to plan.

olof summer

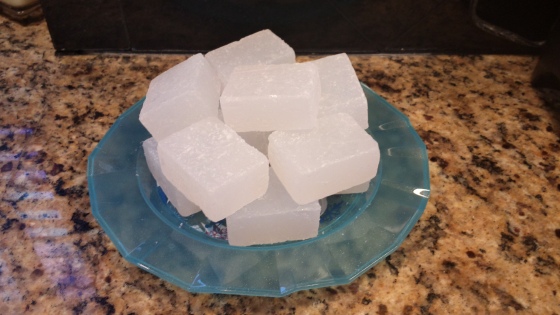
While in the theater last night, I noticed that the ice block scene if very powerful.  And given my recent soap-making hobby, I made a connection: glycerin soap blocks look a lot like ice blocks.

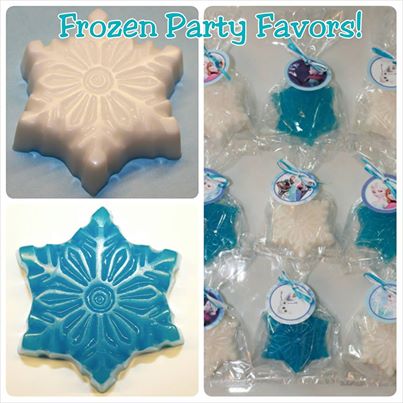
20140119_151824_Richtone(HDR)Obviously, soap blocks won’t melt–regardless of how hot it is–and they’ll make adorable, realistic looking decorations.  Once the party is over, send the girls home with a few blocks in their goody bags.  Or, let the girls make soap as the party craft.  It’s quick and simple to make, plus it’s a favor that the kids can actually use (and be proud of)! If you’d like to purchase snowflake favors instead of making your own, click the image below.

Frozen Party FavorsIf you’ve never made melt and pour soap, check out my previous soap tutorial blog post by clicking here.  Remember to visit my blog again for more party planning tips, and feel free to message me with your own.

20140119_151648_Richtone(HDR)

Sinfully Scrumptious Chocolate Chip Cookies

The next time you’re tempted to run to the store and buy a tube of cookie dough for an upcoming event, don’t.  Make your own!  It takes 15 minutes to whip up your own batch at home (less time than you would spend perusing the aisles of your local grocery store).

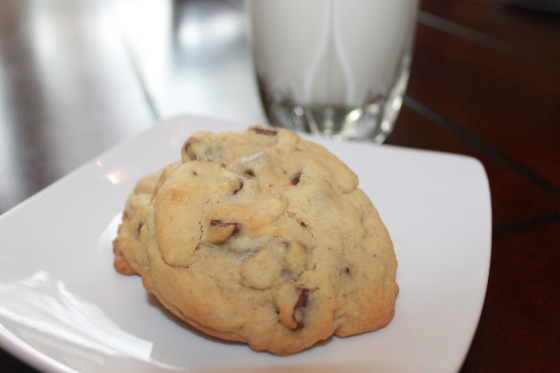
January 2014 - Cookies and Milk

A classic cookie, and a favorite at my house, the recipe below is my go-to choice for chocolate chip cookies.  The cookies from this remarkable recipe are delectable out of the oven–and keep for several days in an air-tight container.  You can drop the dough by spoonfuls on your cookie pan as soon as the ingredients or mixed, or opt to refrigerate (or even freeze) plastic-wrapped “logs” for a quick slice-and-bake treat later in the week.

If you don’t have chocolate chips handy, or you’re looking for a festive twist, swap the 2 cups chocolate chips for 2.5 cups of M&Ms and leave out the pecans.

Beware, this is not your typical back-of-the-package recipe.  There are a couple extra ingredients,of which you likely have on-hand, and the results are much more tasty!

Please give this recipe a try and let me know what you think.

INGREDIENTS

1 cup butter (softened)

1 cup white sugar

1 cup packed light brown sugar

2 eggs

2 teaspoons vanilla extract

3 cups all-purpose flour

1 teaspoon baking soda

2 teaspoons hot water

1/2 teaspoon salt

1/2 teaspoon cream of tarter

2 cups semisweet chocolate chips

1 cup chopped pecans or other nut of choice (optional)

INSTRUCTIONS

1.  Preheat your oven to 350 degrees F.

2.  Cream together: butter, white sugar, and brown sugar.

3.  Beat in the eggs (one at a time), then stir in the vanilla.

4.  Dissolve the baking soda in hot water, then add it to the batter.  Add the salt and cream of tarter.

5.  Stir in: flour, chocolate chips, and pecans.

6. Drop by large spoonfuls onto a parchment paper lined cookie sheet.

7.  Bake for 10 minutes in the preheated oven, or until the edges are browned.  Note: The longer your cookies bake, the crunchier they will be.

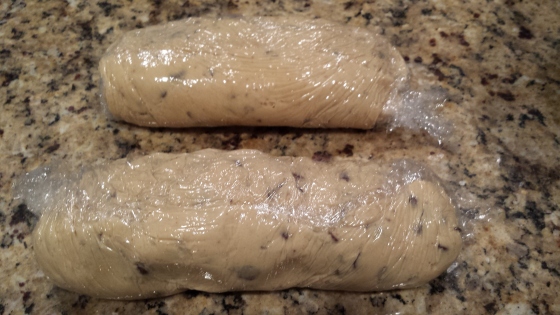
Refrigerator or Freezer Method – Instead of dropping by spoonfuls onto your cookie sheet, divide the dough into two logs and roll in plastic wrap.  When you’re ready to bake, simply slice and bake  (just like the store-bought kind).  If your dough was frozen, let it sit on the counter for about 10 minutes before slicing, then another 20 minutes before baking.

20140110_143934

Homemade Soap Tutorial

I love bees and all things bees (except being stung).  I’ve decided to start using products that incorporate that love into my daily life.  So, I’ve starting making honey soaps.  My first batch was a goat’s milk soap, and I must say the results smell delightful.

My favorite is variety in which I combine my favorite scents–vanilla and almond–with honey and toasted oats.  The result is a smooth, creamy soap with a gentle, earthly aroma with subtle hints of sweetness.
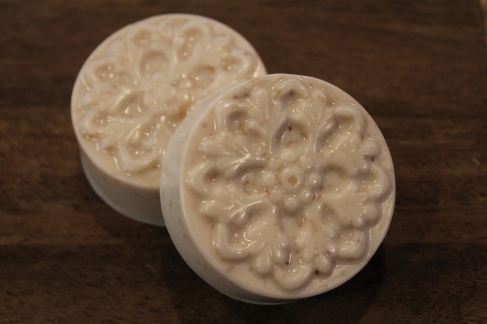
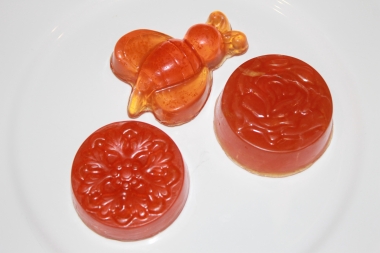
ImageThe idea behind the soap varieties that I’ve created is that each contains a natural exfoliating quality.  Thus far, I’ve used coconut, toasted oats, and orange zest to add texture and natural scents to my soaps.  In the image below, I chose to use the zest of one organic orange to add a fresh, invigorating scent boost–and an uplifting color punch–to an orange honey glycerin soap.
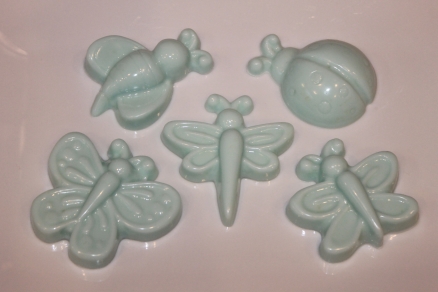
ImageYou may also choose to add colorants, as I did with my fun blue coconut variety.
ImageEnough about my soaps.  Now it’s time to make your own!

How to Make Soap – Honey Almond Vanilla Goat’s Milk Variety

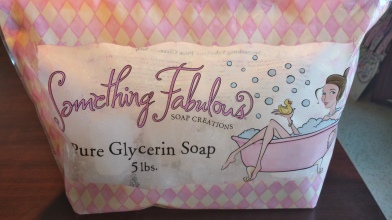
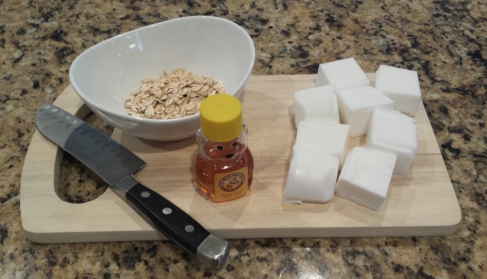
Being a soap-making novice, I opted to start with a base soap.  I chose goat’s milk because I was looking for a creamy spa-like soap with a rich lather.  To make a small batch of either goat’s milk soap or glycerin soap, you will need:

8 ounces soap base

1 tsp. honey

1/2 to 1 1/2 tsp. each: almond extract, vanilla extract, and/or essential oils

1/8 cup whole oats

Soap mold(s) – available at your local craft store
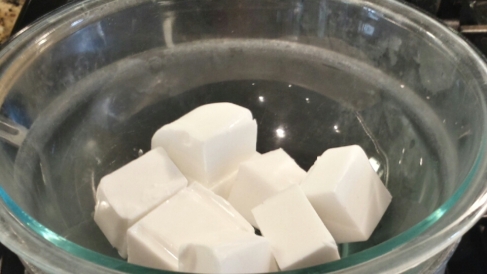
ImageTo begin, melt 8 ounces of the soap base in the microwave at 30 second intervals.  You may also choose to use a double-boiler method, but I find microwaving to be more efficient when making small 8 ounce batches.
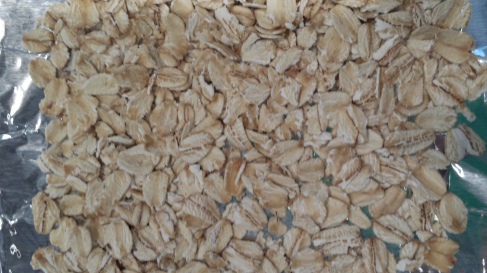
ImageBetween melting intervals, toast 1/8 cup of whole oats in a 250 degree oven for about 3 minutes.  Lay the oats in a thin layer on a baking sheet for an even toast.  You are looking for a slightly golden tint.  But, you don’t want burnt oats so watch (and smell) carefully.
ImageThen, briefly run the oats through a chopper to eliminate large pieces of oats.  The idea is to have tiny oat flecks to gently exfoliate the skin while washing.

Next, add the oats oats to the melted soap base along with: 1.5 teaspoons of vanilla extract (cooking grade), 1/2 teaspoon of almond extract, and 1 teaspoon of honey.  Once combined, simply pour the mixture into soap molds.  If there are bubbles on the backside of the soap, simply spray it lightly with rubbing alcohol until they disappear (this is easy–and magically makes your soap appear silky smooth on the back!).

Depending on your time schedule, you may: let your soap harden on the counter (about 1 hour), put your soap molds in the refrigerator (about 30 minutes), or place the molds in your freezer (about 20 minutes).  Once hard, turn the molds over on a solid countertop and press gently in the center of the mold to release the seal.  You may find that the soaps are hard to remove.  If so, slide them in the freezer for about 10 minutes to break that seal.  NOTE: If your soap is still warm to the touch, do not attempt to release it from the mold.
Image

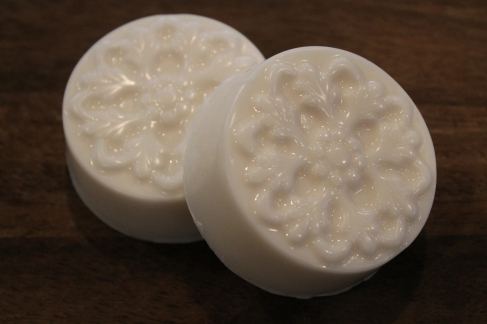
I hope you will find soap making to be as fun and rewarding as I have.  Once you’ve successfully made a batch, match different scents and shapes together for a cute basket to give as gifts–or simply keep for yourself to indulge in.

If you’re interested in purchasing soaps seen in this post, please visit my Etsy shop, ANESoaps, or click HERE.

Cut-Out (Rolled) Sugar Cookie Recipe and Tutorial

Given my recent post on baking sugar cookies, I decided to put together a more in-depth tutorial to accompany the recipe.  The idea for this post is to make Valentine’s Day cookies that can be easily transported to parties and events–and, to make sugar cookies that taste amazing.

ImageThe recipe I prefer is a Williams-Sonoma cut-out cookie recipe with a sugar cookie icing that dries shiny.  Because the icing dries, you are left with beautiful cookies that can be stacked if necessary.  However, the icing is still soft to the touch–not hard like royal icing.  To view my previous post that includes my favorite cut-out sugar cookie recipe and sugar cookie icing recipe, click HERE. Or, visit the “Recipes” tab of my blog when you’re finished reading this post.
Tip #1

Baking sugar cookies is a process.  Therefore, I suggest that you make your dough ahead of time.  Yes, making the dough only takes about 30 minutes.  But, rolling it out and cutting it, then baking the cookies and decorating them takes time too.  So, make the dough ahead of time and store it–wrapped in saran wrap–for up to 3 days in your fridge.

Tip #2

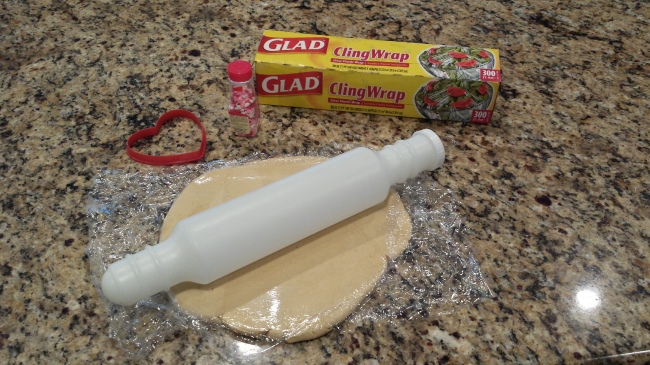
Rolled sugar cookies can become very bland when rolled out on a dusted flour surface, especially the scraps that have been rolled out a few times. So prevent an over-floured dough, roll your cookies on saran wrap.  Your cookies should already be wrapped up from the cooling process, so open out that piece and lay a second piece on top of the dough.  Then, roll out the dough.  You’ll save prep time and clean-up time, plus your last scrap of dough will taste as good as the first.

Image

Tip #3

Dip your cookie cutters in sugar or flour before cutting the dough.  This will help your dough slide out of nooks and crannies of the cutter more easily–maintaining the true shape of the cookie.

Tip #4

Use the same cookie cutter or one of similar size for each cookie on a single sheet.  This will ensure that all cookies on the sheet bake evenly and completely.

Tip #5

Pop your cut-out cookies in the fridge (on the baking sheet) for about 15 minutes before baking.  This will help ensure that your cookies bake in the cut-out shape instead of spreading across the pan.  This tip is especially important when using small cookie cutters or those with intricate details.

ImageTip #6

Bake on parchment paper.  You don’t need to grease your cookie sheet when using parchment paper, so your cookies slide right off the pan without tasting of oil.

Tip #7

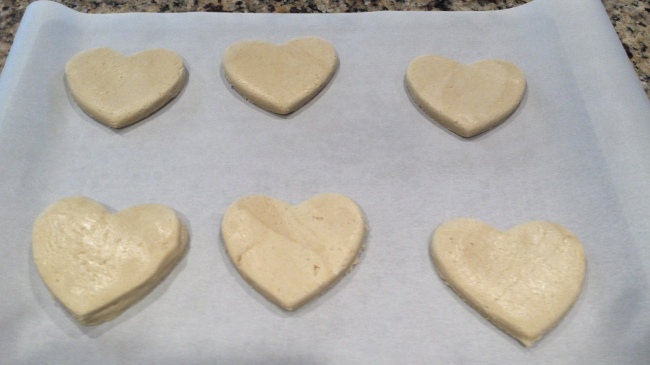
Space your cookies far enough apart that if they do “grow” a bit while baking, they don’t touch (see pic above).  I usually aim for about 1 1/2 inches between cookies.

Tip #8

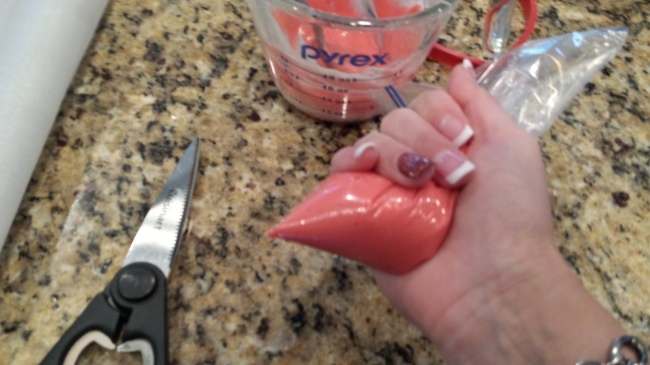
If you don’t have piping bags, don’t worry–use zip lock bags.  When decorating basic sugar cookies, you only need lines.  So, place your icing in a zip-lock baggie (zip it up!), and snip the corner.  I use a small snip to ice the edges (see Tip #9), and a large snip to squeeze the main color on before spreading it across the cookie.

ImageTip #9

Squeeze a thin line of icing around the entire edge of the cookie.  Then, let that line dry completely.  One dried, you will have much more freedom to fill in the design without the risk of icing running down the edges of your cookies.  In the picture below, you’ll notice two things: 1. I’m not a professional decorator.  2. The white icing around the edges of the cookies prevented run-off while allowing me to use a fair amount of fill-in icing on the cookie.

ImageTip #10

If you plan to add sprinkles or colored sugar, so do after icing each cookie.  The icing takes about 30 minutes – 1 hour to dry completely, but in just minutes to top will have begun to set.  Once the icing begins to set, your sprinkles will bounce off onto your counter instead of nestling in the icing.

Image

I hope you will find these tips to be helpful for your sugar cookie endeavor.  If you have questions, please feel free to ask.  I’ll do my best to respond the same day.  Enjoy!

Valentine’s Day Sugar Cookie Recipe

With Valentine’s Day fast approaching, we will all be looking for cute treats to send our kids to school with.  I made my famous sugar cookies for Christmas this year, and as always they traveled well for hundreds of miles.  Meaning, they can be stacked and transported by your young ones to school without the fear that they will look mangled upon arrival.  The icing dries shiny (and firm), so stacking them is not a problem.  Below is a snapshot of my Christmas version, but hearts with pink, white, and red icing are obviously your go-to choice for Valentine’s Day.  Enjoy!

20131223_162944

Update: This afternoon I made a batch of Valentine’s Day sugar cookies for my girls.  Any variation of heart-shaped cookies with white, pink or red icing would work, as would round cookies with colored icing and sprinkles.

20131228_151016_Richtone(HDR)

Sugar Cookie Recipe (Williams-Sonoma)

INGREDIENTS:

2 1/2 cups all-purpose flour

1/2 tsp. salt

12 Tbs. (1 1/2 sticks) unsalted butter, at room temperature

1 cup sugar

1 egg

1 1/2 tsp. vanilla extract

TO PREPARE:  Over a small bowl, sift together the flour and salt. Set aside.

In the bowl of an electric mixer fitted with the flat beater, beat the butter on high speed until creamy, about 2 minutes. Reduce the speed to medium, slowly add the sugar and beat until light and fluffy, about 2 minutes, stopping the mixer occasionally to scrape down the sides of the bowl. Add the egg and vanilla and beat for 1 minute, stopping the mixer once to scrape down the sides of the bowl.

Stop the mixer and add half of the flour mixture. Beat on low speed until most of the flour has been absorbed, about 1 minute. Add the remaining flour and continue beating until all of the flour has been absorbed and the dough starts to pull away from the sides of the bowl, 2 to 3 minutes.

Turn the dough out onto a work surface and divide into 2 equal balls. Shape each into a disk and wrap separately in plastic wrap. Refrigerate for at least 2 hours or up to 2 days.

Remove the dough from the refrigerator and let stand for 10 minutes. On a lightly floured surface, roll out the dough 3/16 to 1/4 inch thick.

Preheat an oven to 350°F. Line several baking sheets with parchment paper.

Cut out the desired shapes. If the dough sticks to the cutter, dip the cutter into flour before cutting out more shapes. Using a small offset spatula, transfer the cookies to the prepared baking sheets, spacing the cookies about 1 inch apart.

Bake the cookies until golden brown around the edges, 10-12 minutes. If baking more than one sheet at a time, rotate the baking sheets from top to bottom and 180 degrees halfway through baking.

Transfer the baking sheets to wire racks and let cool for 5 minutes, then transfer the cookies to the racks and let cool completely. Store the cookies in an airtight container at room temperature. Makes about 20 cookies.

Sugar Cookie Icing Recipe

INGREDIENTS:

1 cup powdered sugar

2 teaspoons milk

2 teaspoons light corn syrup

1/4 teaspoon almond extract

TO PREPARE:  In a small bowl stir together powdered sugar and milk until smooth.  Stir in corn syrup and almond extract until icing is smooth and glossy.  If icing is too thick, add more corn syrup.  Add food coloring if desired.

‘Twas the Night Before Christmas Craft

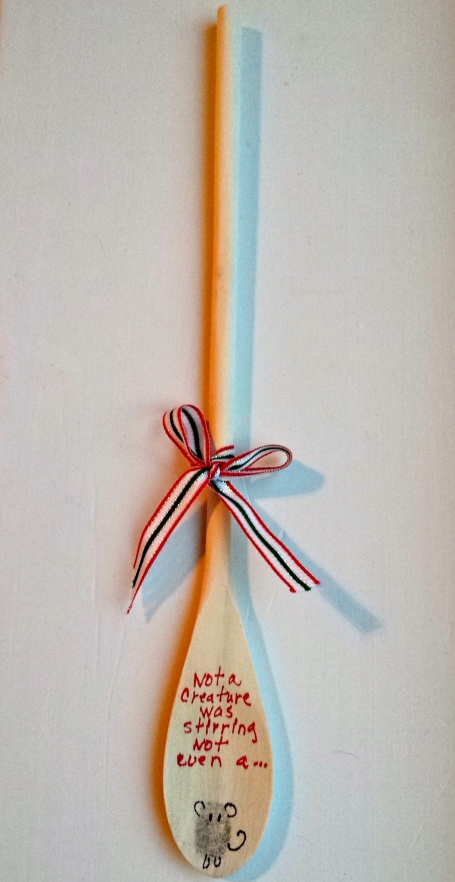
My all-time favorite Christmas story is “‘Twas the Night Before Christmas”.  So, when my daughter brought home this adorable craft as my Christmas gift from school I was in love.

Image

This simple treasure is a wooden spoon featuring the quote, “not a creature was stirring, now even a . . . “.  At the bottom is a thumbprint mouse.

These cute spoons will make an adorable Christmas keepsake gift for loved ones.  To make your own, follow the steps below.

What you’ll need: wooden spoon, black and red fine-tip sharpies, black ink pad, and ribbon (optional).

1.  Stamp your little one’s thumb at the bottom of the spoon.

2.  Draw on the mouse’s features

3.  Write: Not a creature was stirring, not even a . . . 

4.  Tie a ribbon on the handle for added charm.

You may also want to attach a wallet-size picture of your child.  My spoon was given to me in a cello bag.  Because a ribbon is already attached, though, wrapping is optional.